Connect Lever → SwiftLynx (5-minute setup)
SwiftLynx automatically analyzes new applications from Lever and posts a summary to Slack.
Most teams complete setup in ~5 minutes — just follow the steps below.
TL;DR (recommended)
- In SwiftLynx → Settings → Integrations, click the Lever card to start OAuth (no form to fill). Connect Slack separately via the Slack card if you haven’t already.
- You'll be redirected to Lever to authorize SwiftLynx. Select your Lever account and click Accept.
- SwiftLynx automatically creates the webhook in Lever. You'll be redirected back to SwiftLynx.
- Submit a test application in Lever → you should see a Slack summary, and the analysis note and match score tag will be added to the candidate's profile in Lever. 🎉
Step 1 — In SwiftLynx: Connect Lever
Go to Settings → Integrations, click the Lever card. Make sure you're signed in first.
Click the Lever card to start OAuth. To receive Slack notifications, connect Slack separately: click the Slack card on the same page and connect via OAuth.
Step 2 — In Lever: Select Your Account
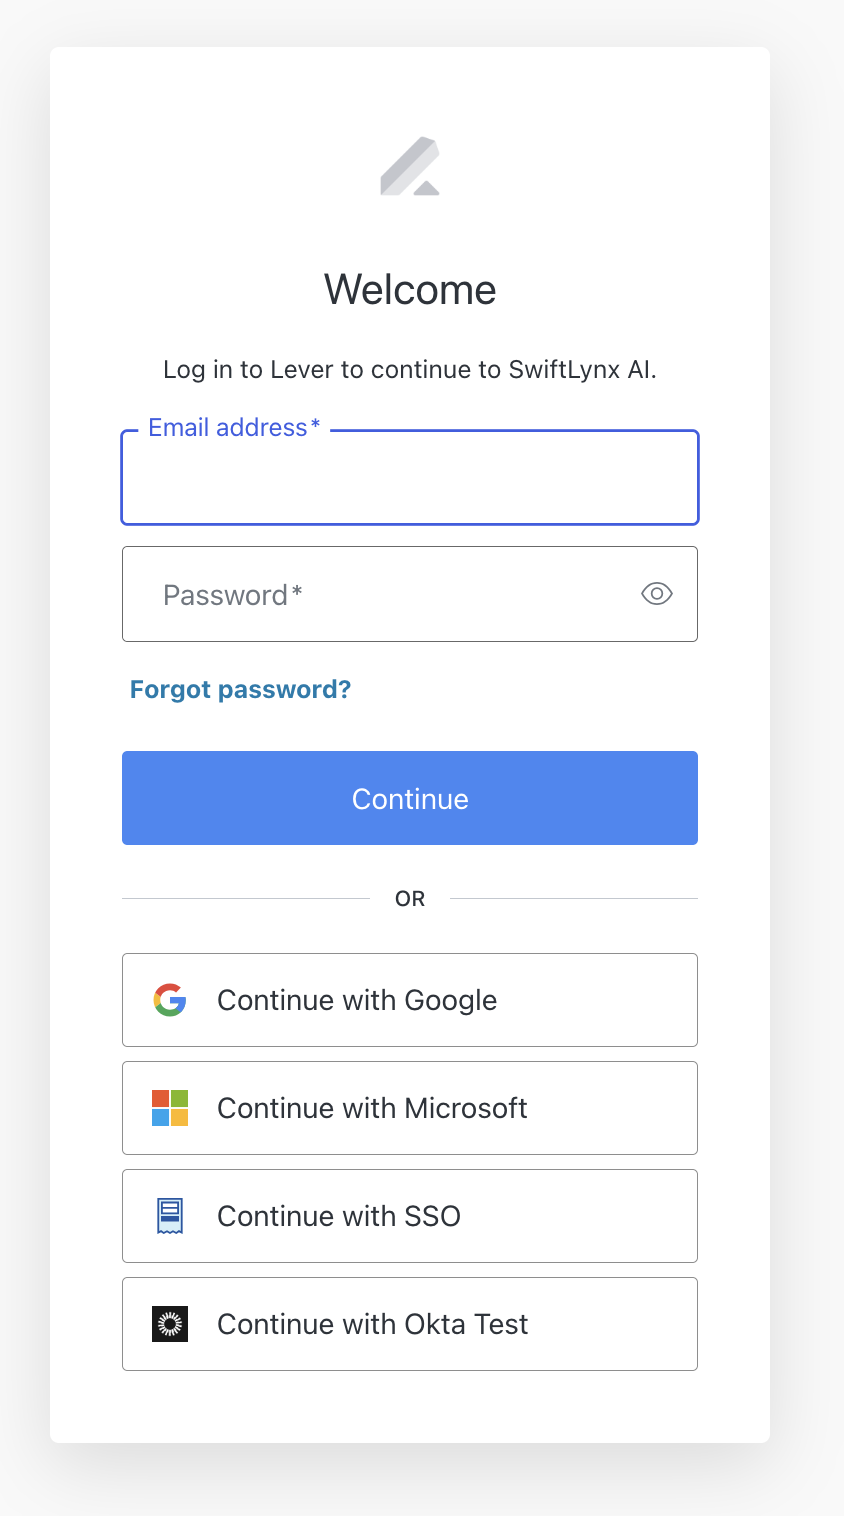
After you click the Lever card in SwiftLynx, you'll be redirected to Lever's login page.
- Select your Lever account: If you have multiple Lever accounts, choose the one you want to connect. You can log in with email/password, or use Google, Microsoft, SSO, or Okta.
After logging in, you'll see the authorization page.
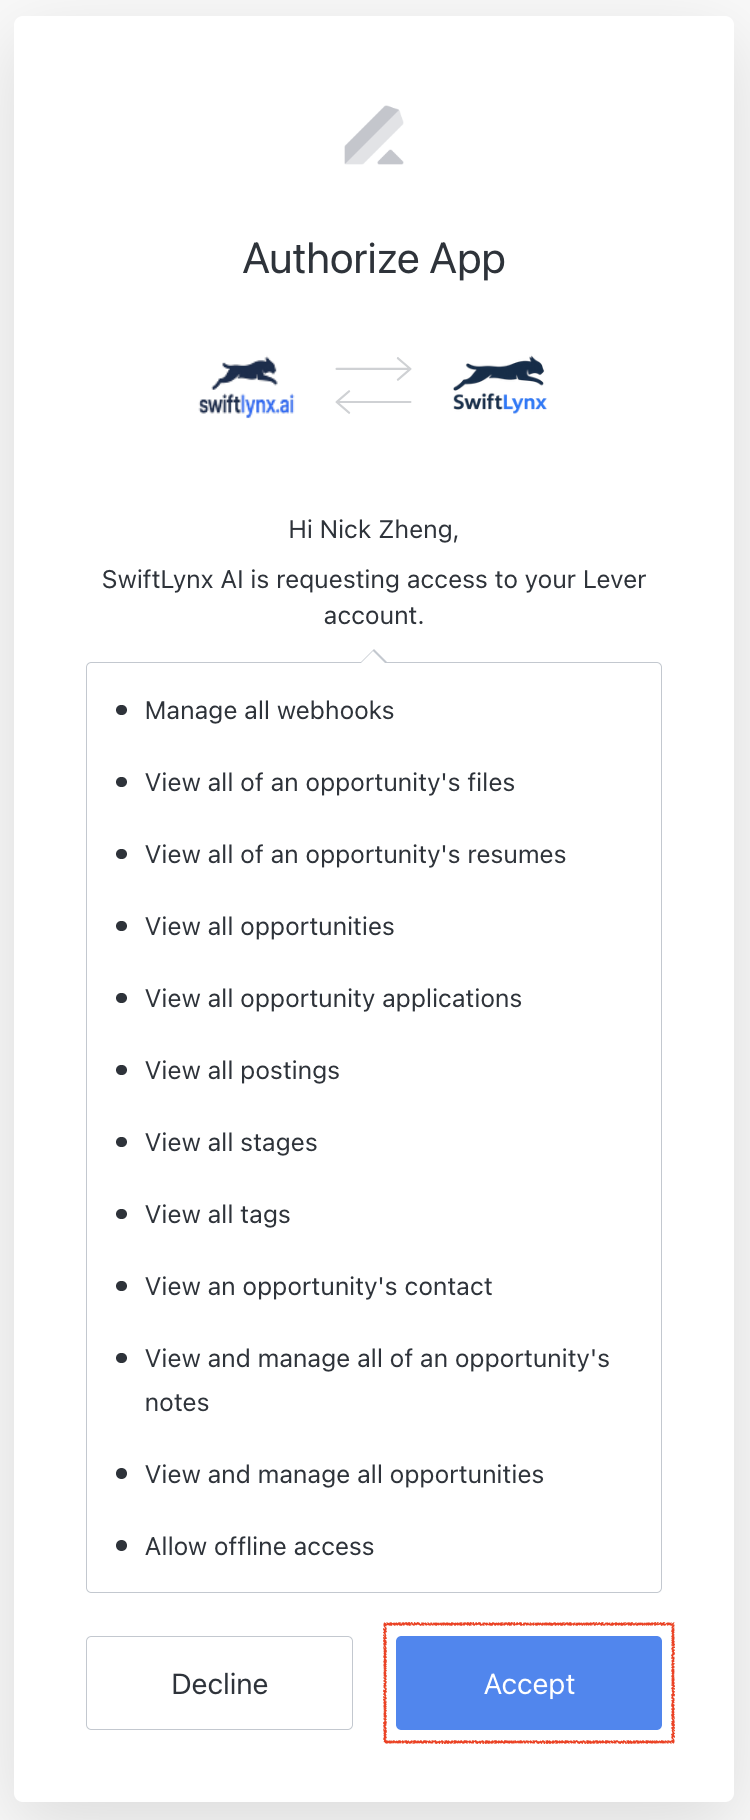
- Review permissions: SwiftLynx requests access to:
- Manage all webhooks
- View all of an opportunity's files
- View all of an opportunity's resumes
- View all opportunities
- View all opportunity applications
- View all postings
- View all stages
- View all tags
- View an opportunity's contact
- View and manage all of an opportunity's notes
- View and manage all opportunities
- Allow offline access
- Click Accept: This authorizes SwiftLynx to access your Lever data and completes the connection.
Note: If you see an "access denied" error, make sure you're using a Lever account that exists in your Lever instance. SwiftLynx verifies that the authorized account is valid before completing the connection.
Step 3 — Automatic Webhook Setup
After you authorize SwiftLynx in Lever, the following happens automatically:
- SwiftLynx receives OAuth tokens from Lever
- SwiftLynx automatically creates a webhook in Lever for the
applicationCreatedevent - You're redirected back to SwiftLynx with your integration ready to use
✨ No manual webhook configuration needed! Unlike other integrations, Lever uses OAuth and automatic webhook creation, so you don't need to manually copy URLs or tokens.
You can verify the webhook was created by going to Lever → Settings → Integrations and API → Webhooks.
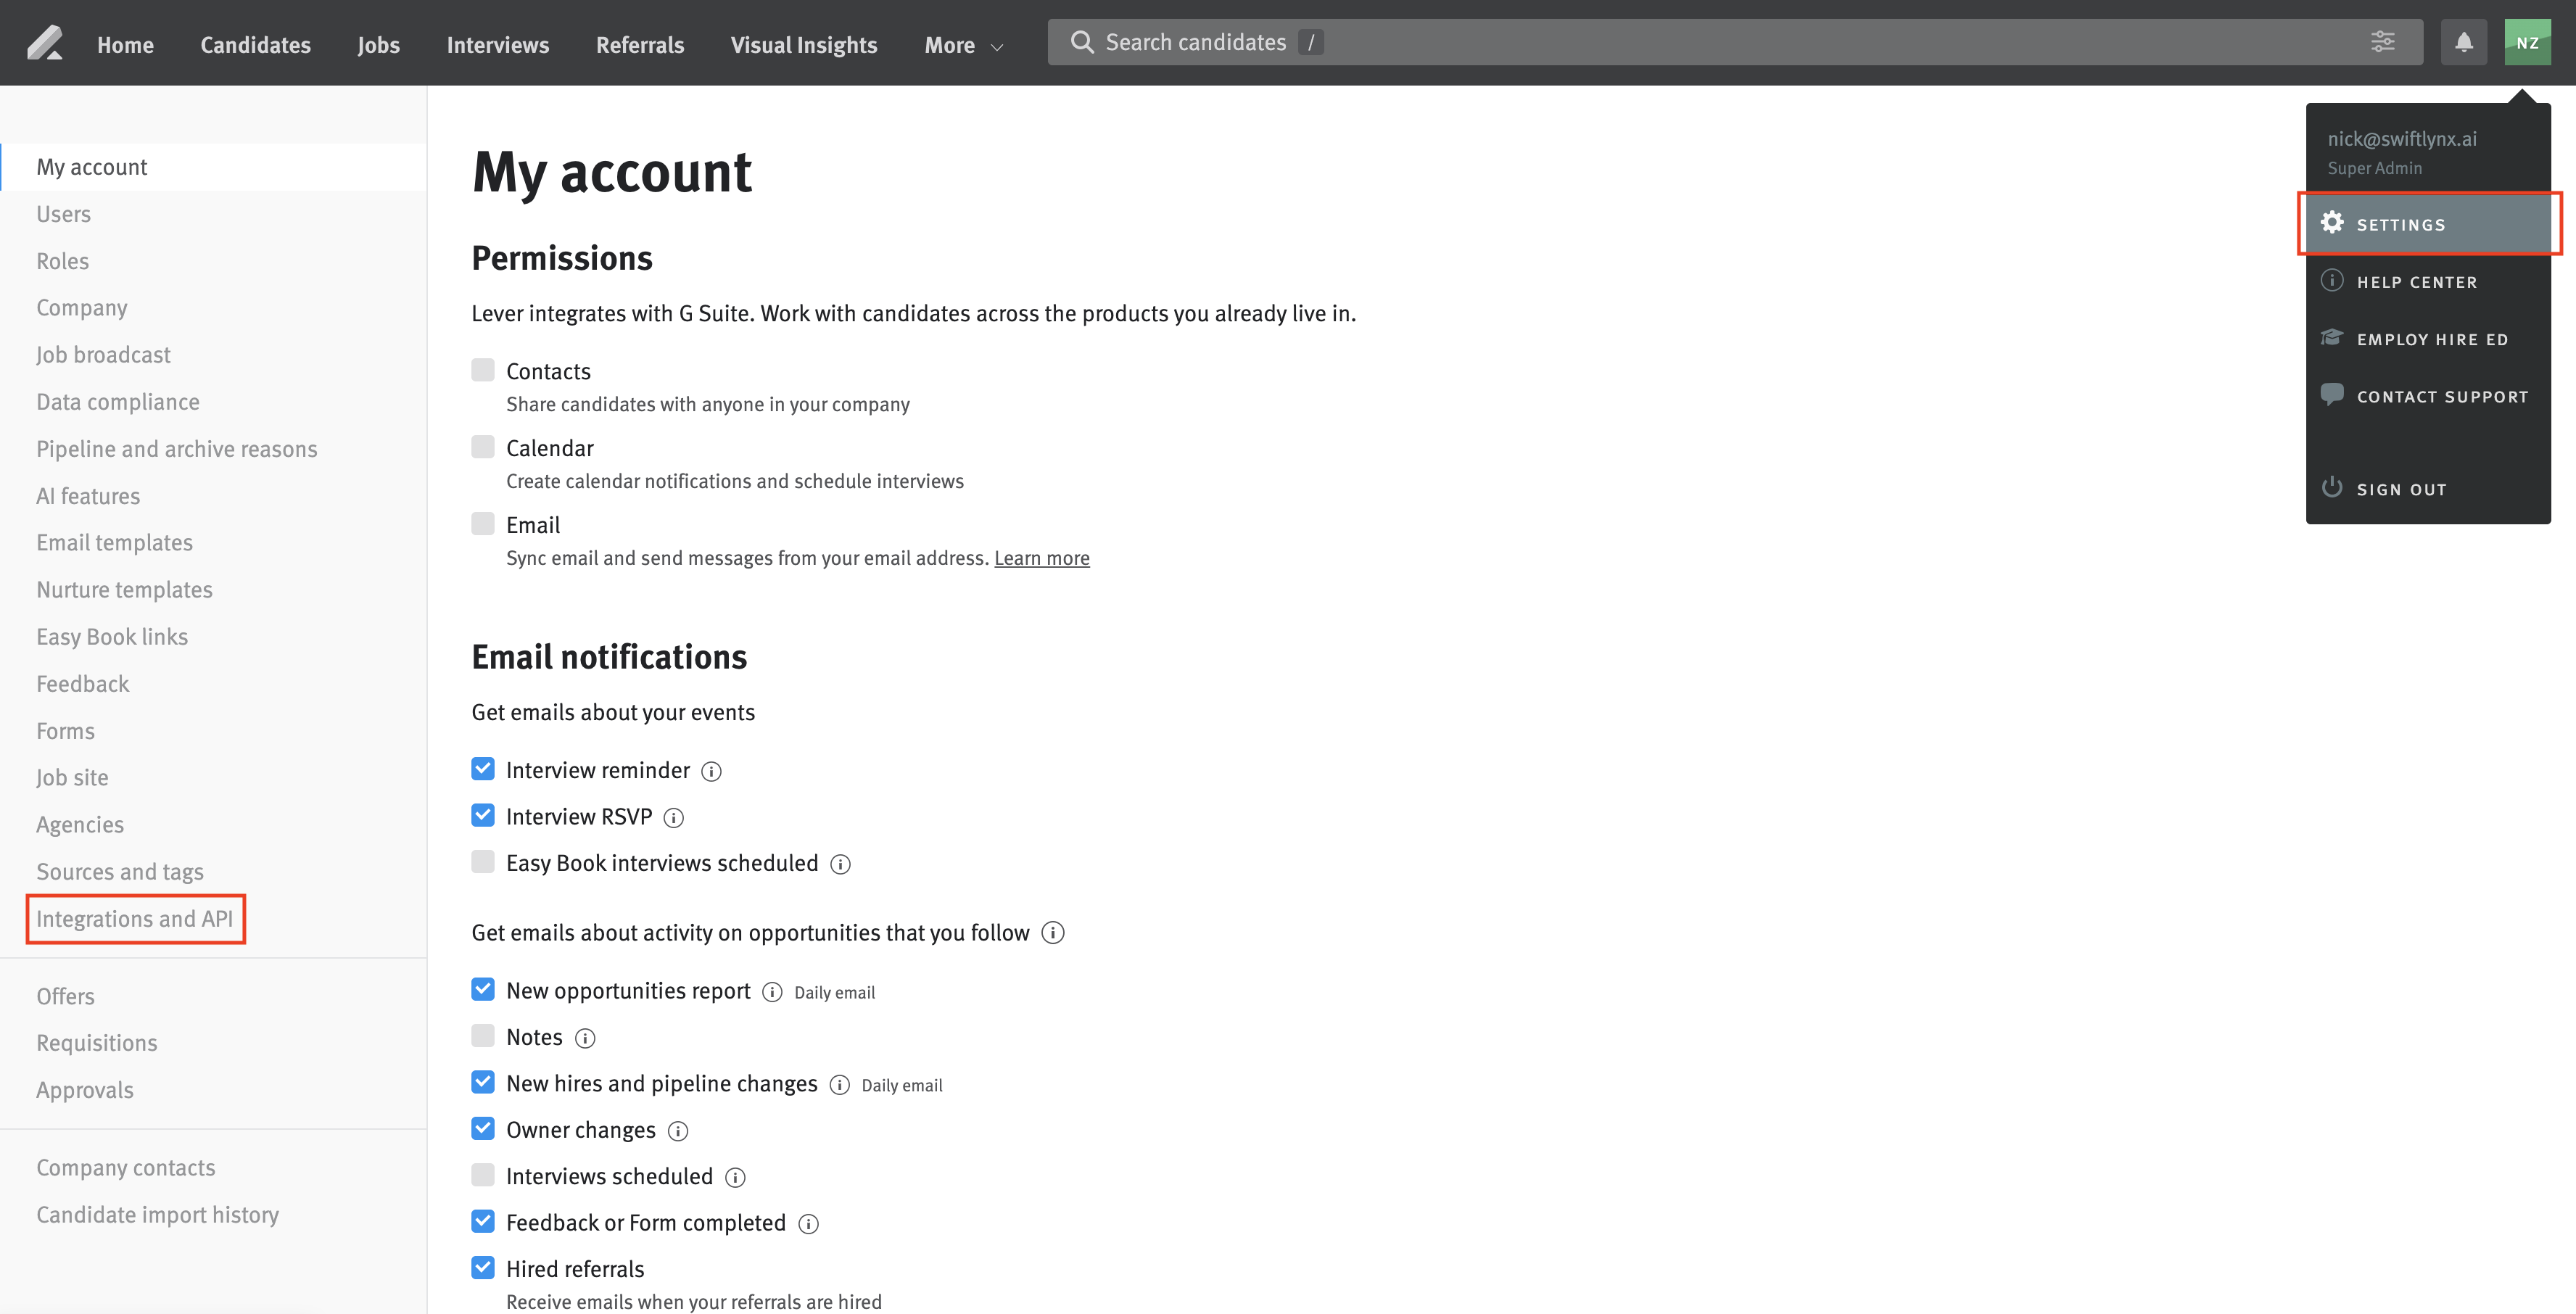
In the left sidebar, click "Integrations and API" to view your integrations and webhooks.
Click the "WEBHOOKS" tab at the top of the page.
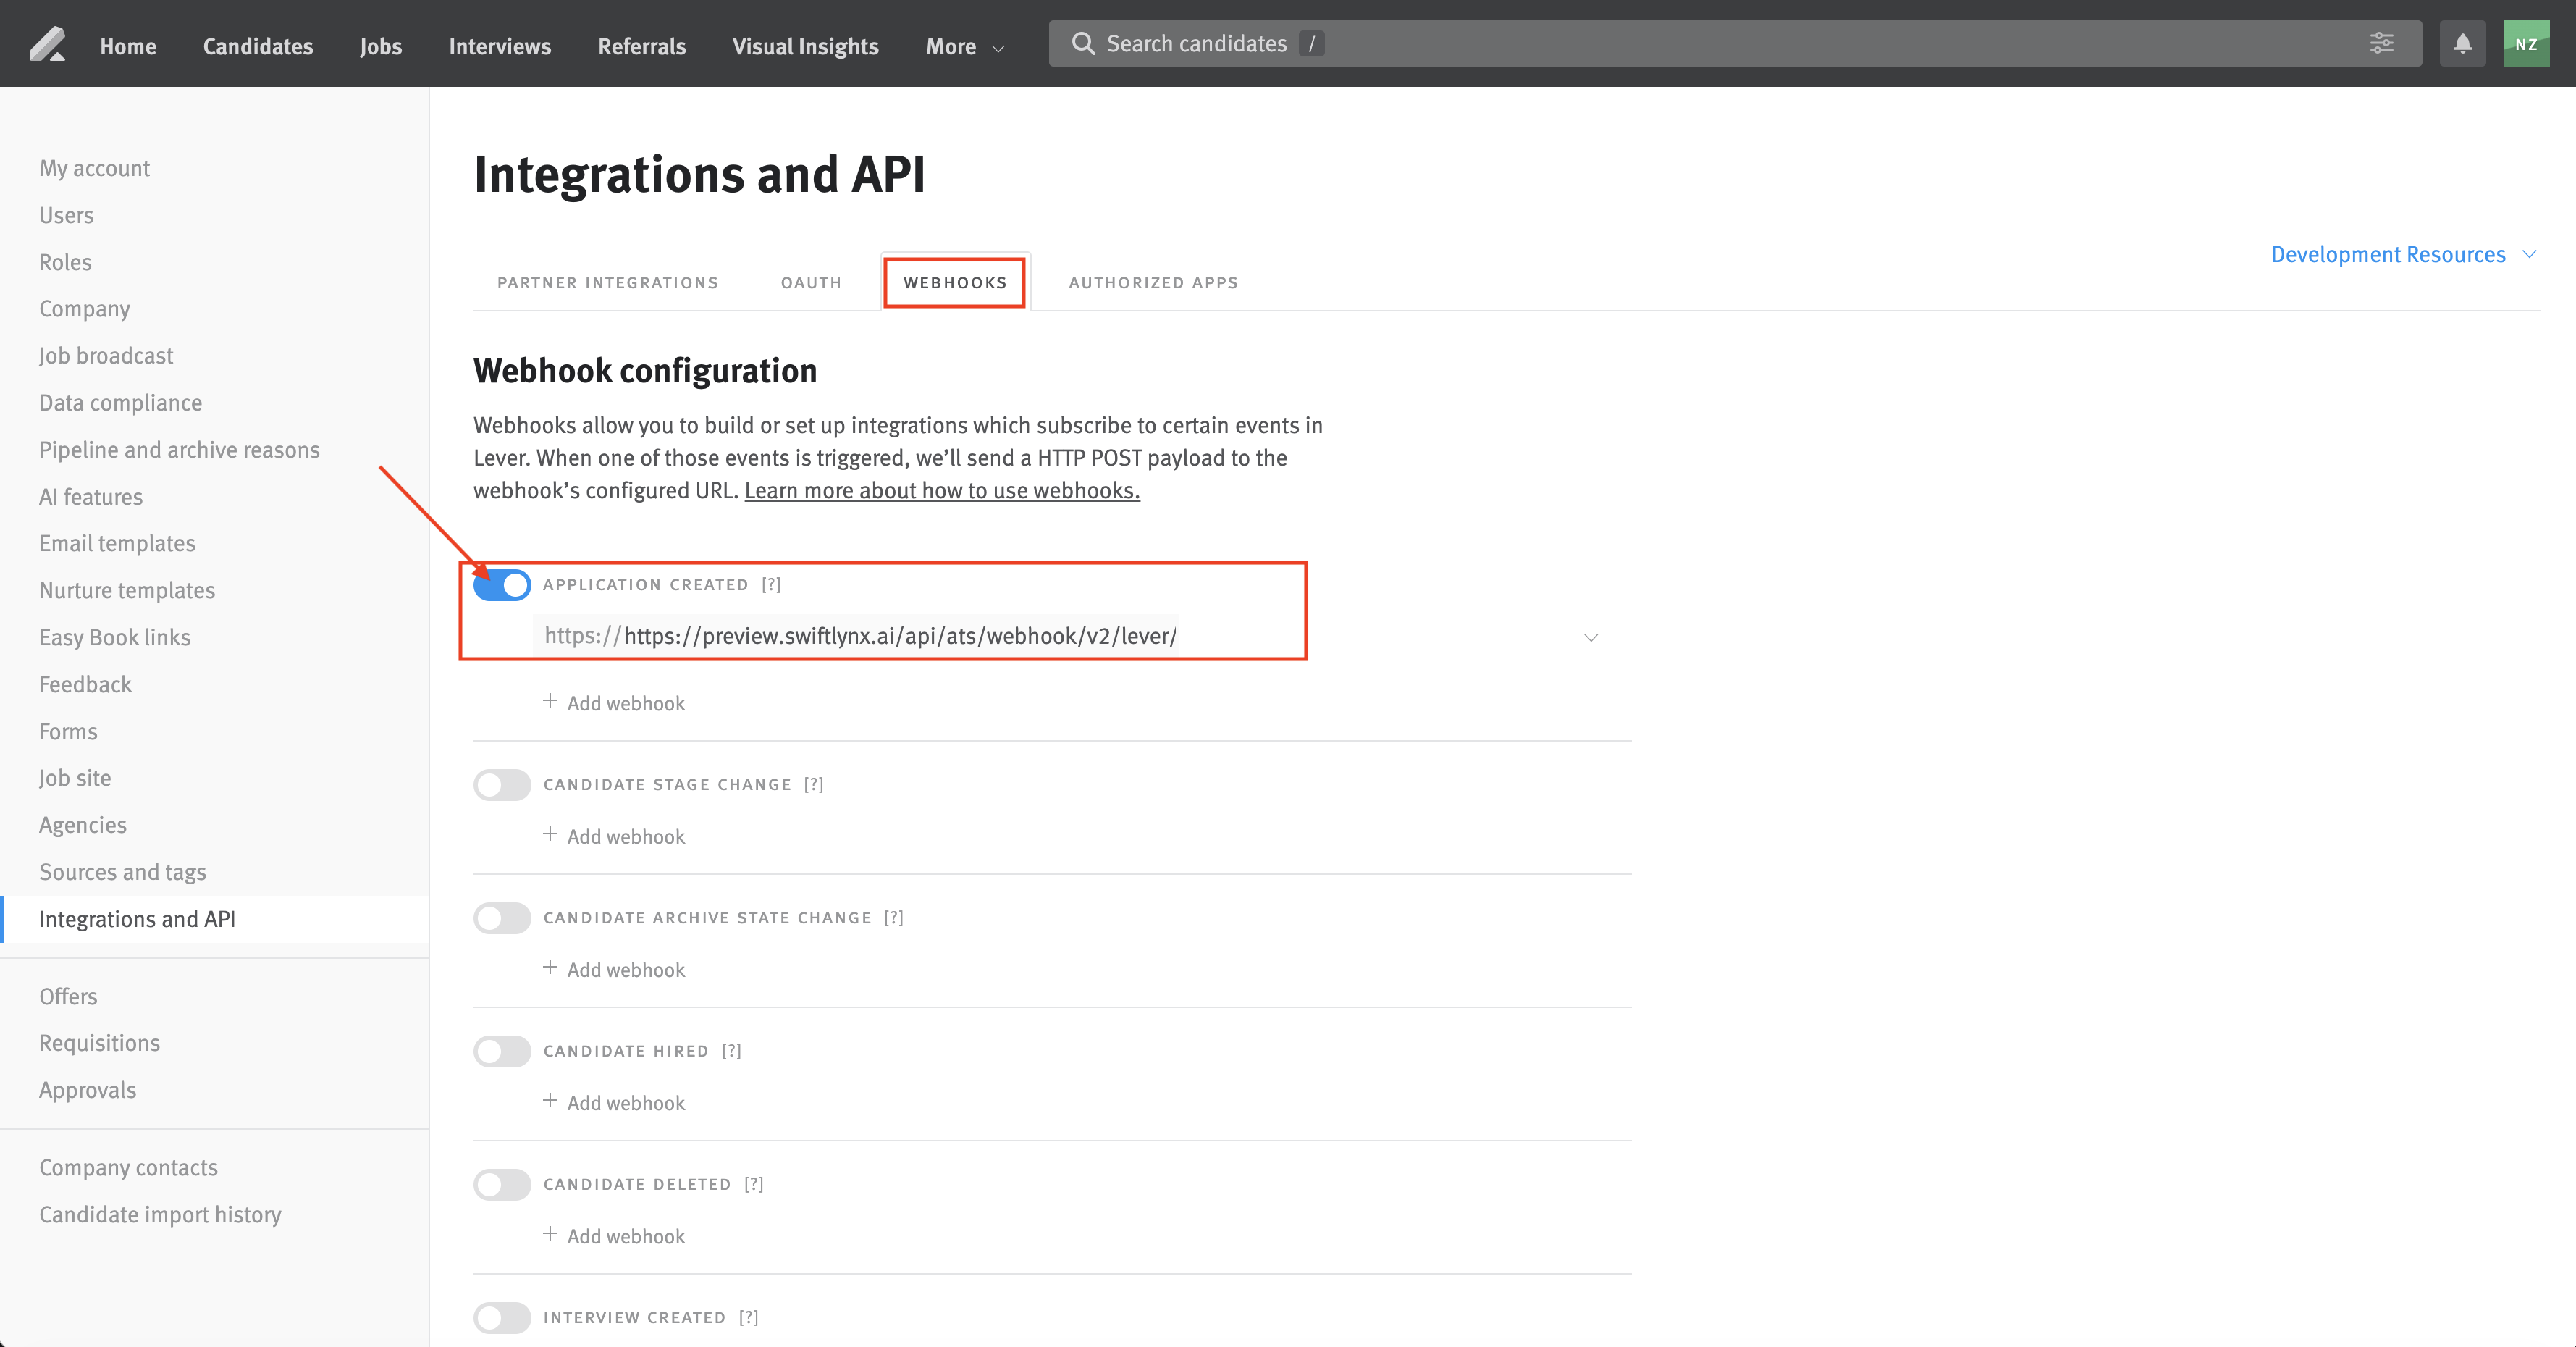
You should see:
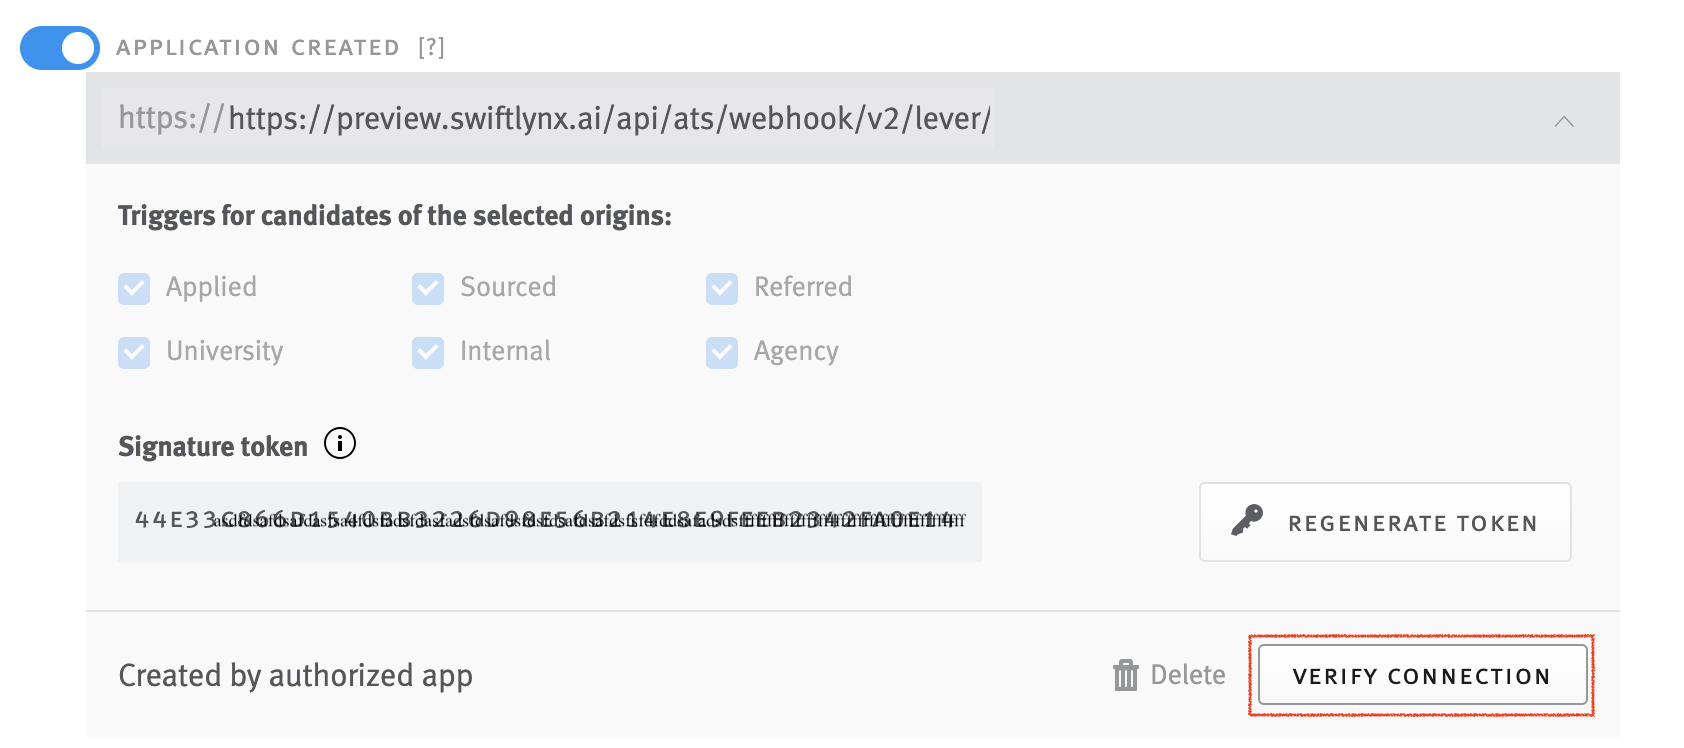
- The "APPLICATION CREATED" event toggle should be enabled (blue/checked). If it's disabled, click the toggle to enable it.
- A webhook URL pointing to SwiftLynx is automatically configured below it
- The webhook URL format:
https://preview.swiftlynx.ai/api/ats/webhook/v2/lever/[integration-id]
You can click the "VERIFY CONNECTION" button to test if the webhook is working correctly. This will send a test request to SwiftLynx and confirm the connection is successful.
Step 4 — Configure Job Monitoring (Optional)
Job monitoring is configured on the Jobs page, not on the ATS integration page.
- Enable or disable monitoring: Go to Jobs, select one or more jobs using the checkboxes, then click Start monitoring or Stop monitoring in the bottom bar. Jobs with monitoring enabled appear under the Monitoring tab.
- Score threshold: Open a job (click the job title) to view its detail page. In the right sidebar, set Score threshold (default 80). Slack notifications are sent for candidates scoring at or above this threshold.
- Slack channel (optional): You can configure a Slack channel per job from the job detail page when available.
- Dynamic updates: Rankings update automatically as new applications come in.
Using the Integration
Once your integration is set up, SwiftLynx can analyze candidates in two ways:
Automatic Analysis (Single Candidate)
When a new application is submitted in Lever, SwiftLynx automatically analyzes the candidate via webhook. Within moments, SwiftLynx will:
- Analyze the candidate's resume against the job requirements
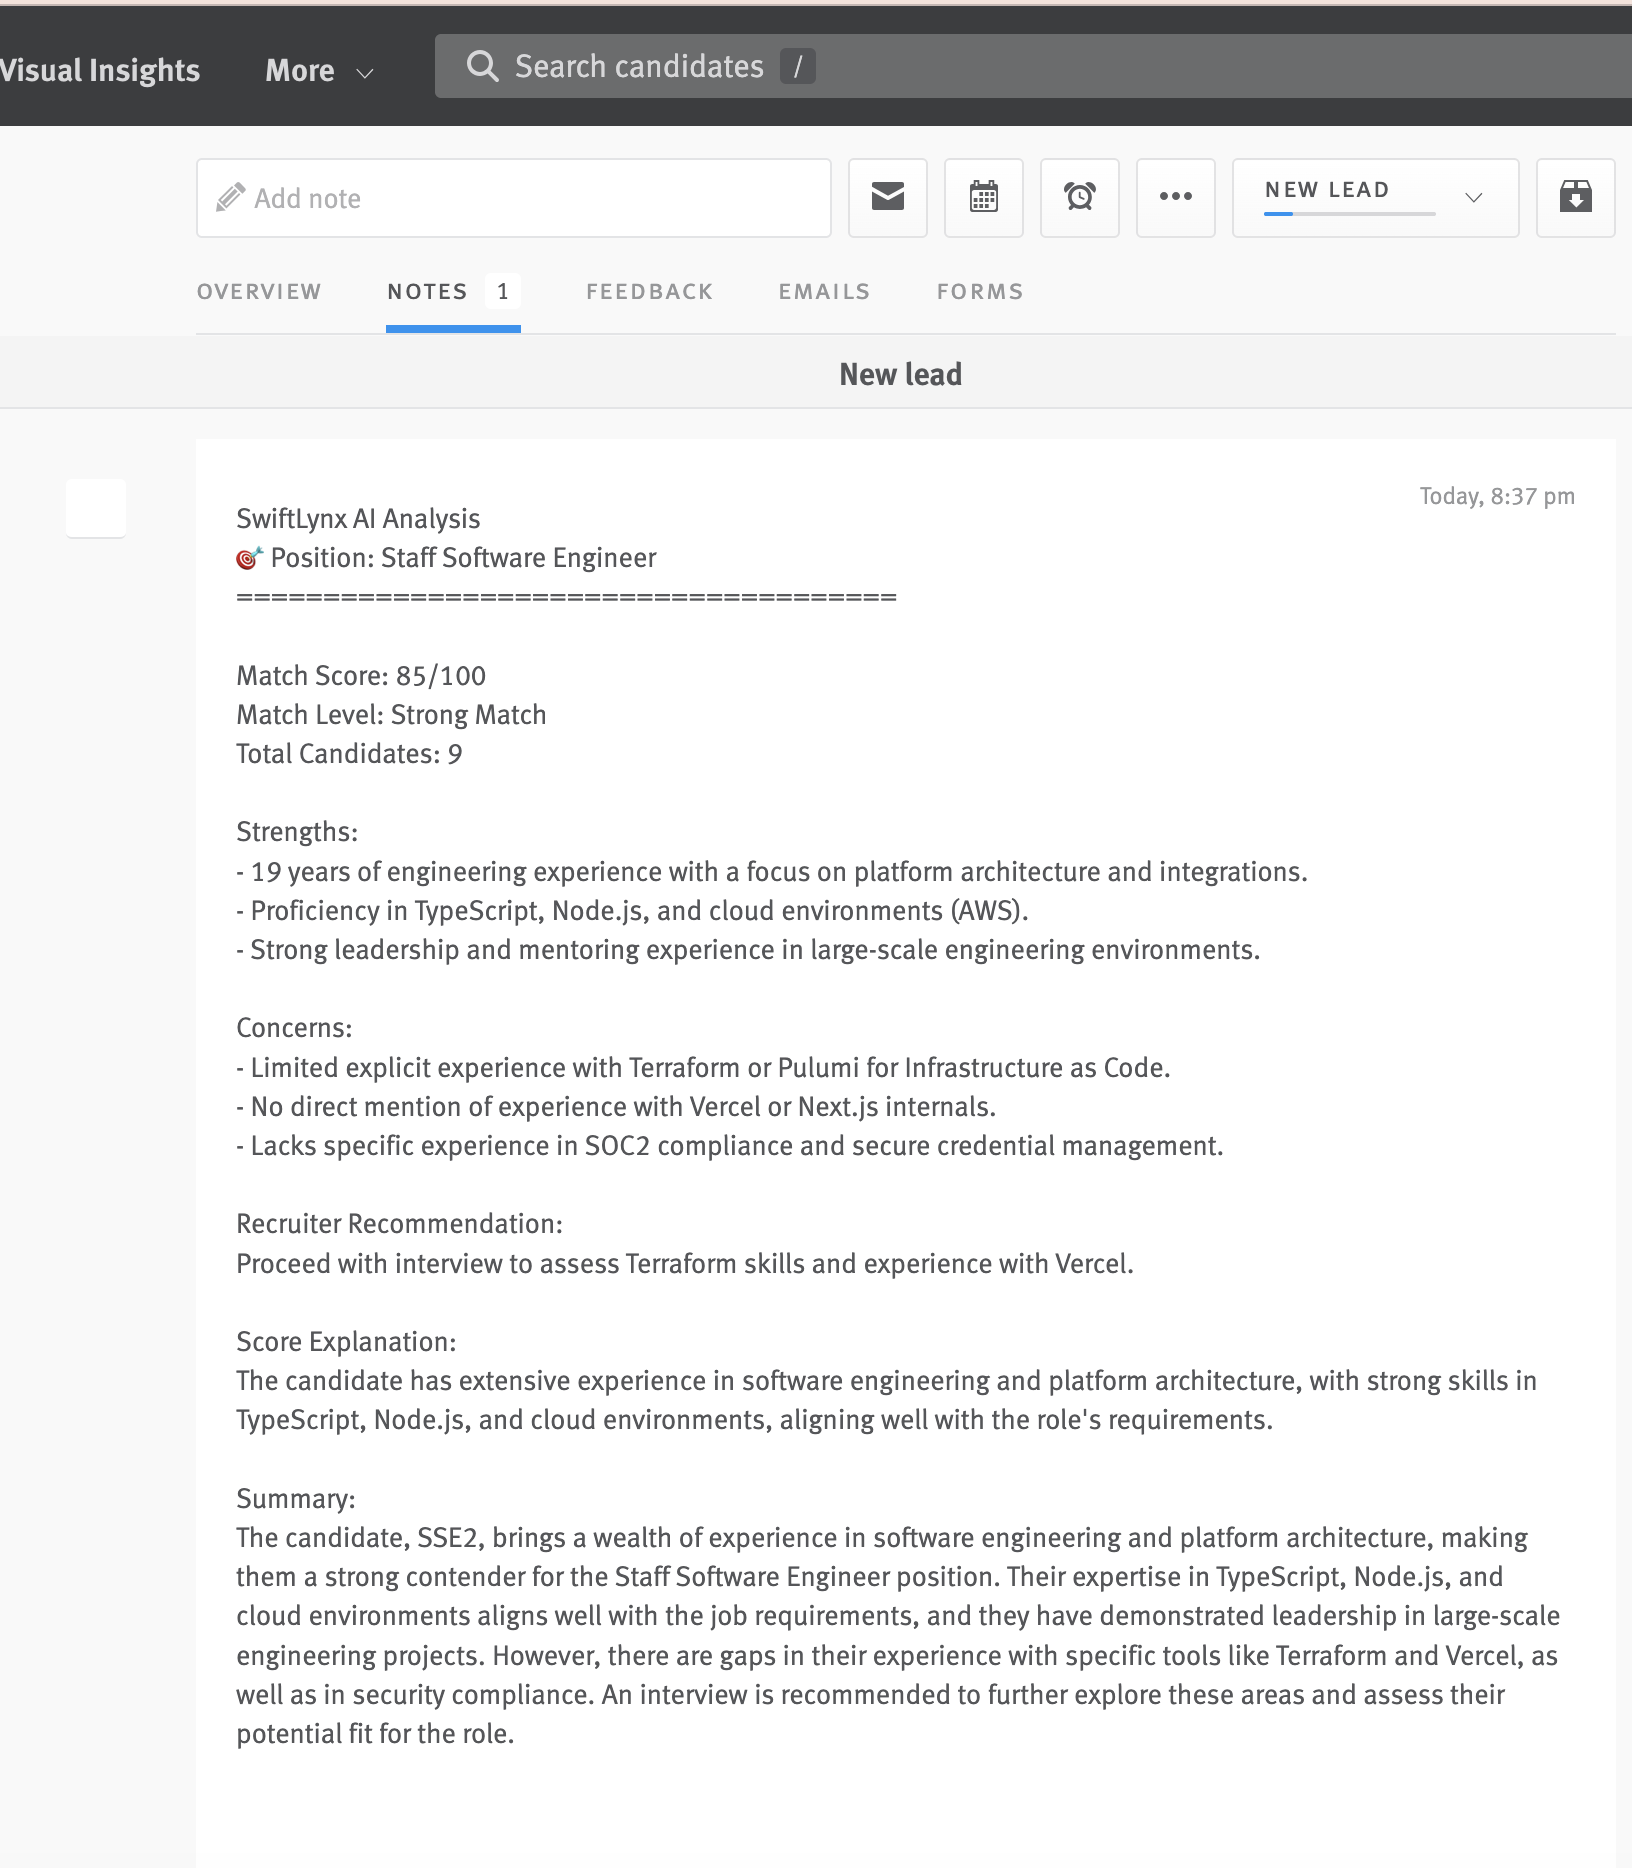
- Add a detailed analysis note to the candidate's profile in Lever
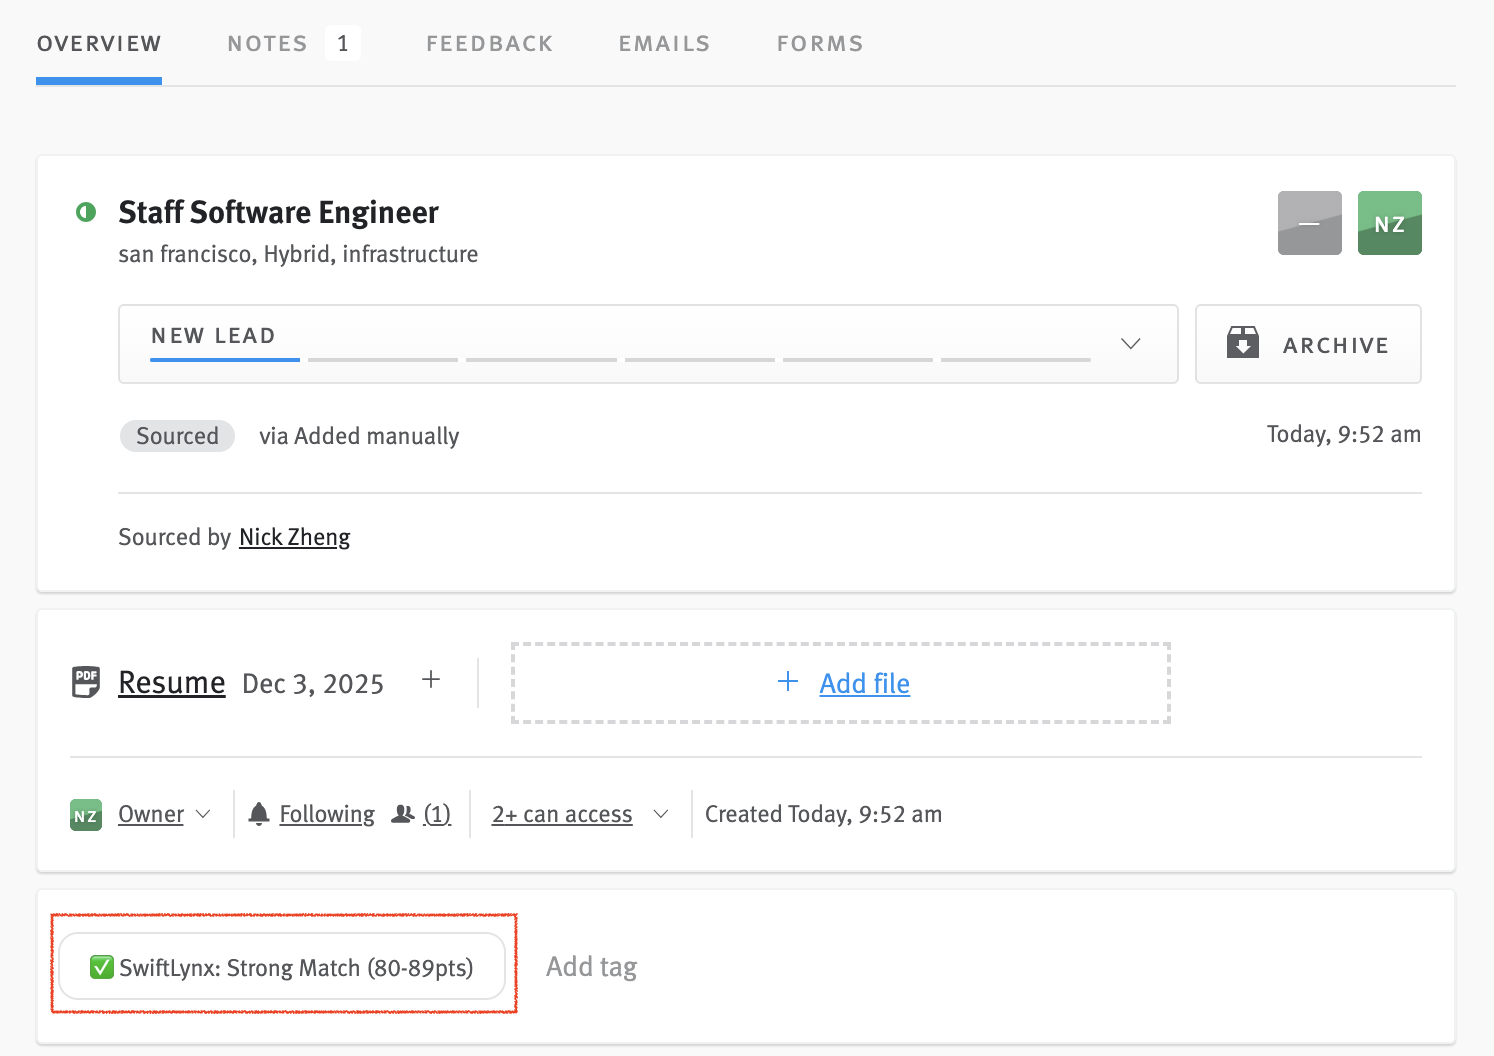
- Add a tag to the candidate indicating the match score (e.g., "✅ SwiftLynx: Strong Match (80-89pts)")
- Send a Slack message with the analysis summary and a link to the full report
To test: Submit a test application in Lever. Then check:
- In Lever: Go to the candidate's profile and check the NOTES tab. You should see a note titled "SwiftLynx AI Analysis" with the complete analysis.
- In Lever: You should also see a tag on the candidate's profile indicating the match score.
- In Slack: You should receive a message with the analysis summary.
Example Slack message:
Application analyzed (lever)
Candidate: Jane Doe
Job: Engineering Manager
Match score: 65/100
Match Level: Review Needed
Rank: 49 out of 49

Strengths:
- Extensive leadership experience
- Strong background in platform reliability
- Experience with global teams

Concerns:
- Lacks specific experience in writing job descriptions
- No direct mention of mentoring experience
- Unclear motivation for the specific role

Recruiter Recommendation:
Consider for interview if mentoring and job description writing can be developed.

Score Explanation:
The candidate has extensive experience in engineering leadership and platform reliability but lacks specific experience in writing job descriptions and mentoring.

Summary:
Jane Doe has a strong background in engineering leadership with 17 years of experience, particularly in platform reliability and managing global teams. However, the resume does not highlight specific experience in writing job descriptions or mentoring, which are key requirements for the role. If Swift can demonstrate these skills or is open to developing them, they could be a valuable asset to the team. An interview could further assess their fit for the role and motivation for joining the company.

View Profile
View Full Report: Click here to view detailed analysis
Bulk Import (Multiple Candidates)
You can use the Bulk Import feature to analyze multiple historical candidates at once for any job. This is useful for analyzing existing candidates in Lever before new applications start coming in.
On the job detail page (Jobs → click a job title), click "Import from ATS" in the top right (next to "+ Add candidate"). This opens the Bulk Import flow for Lever (and other connected ATS).
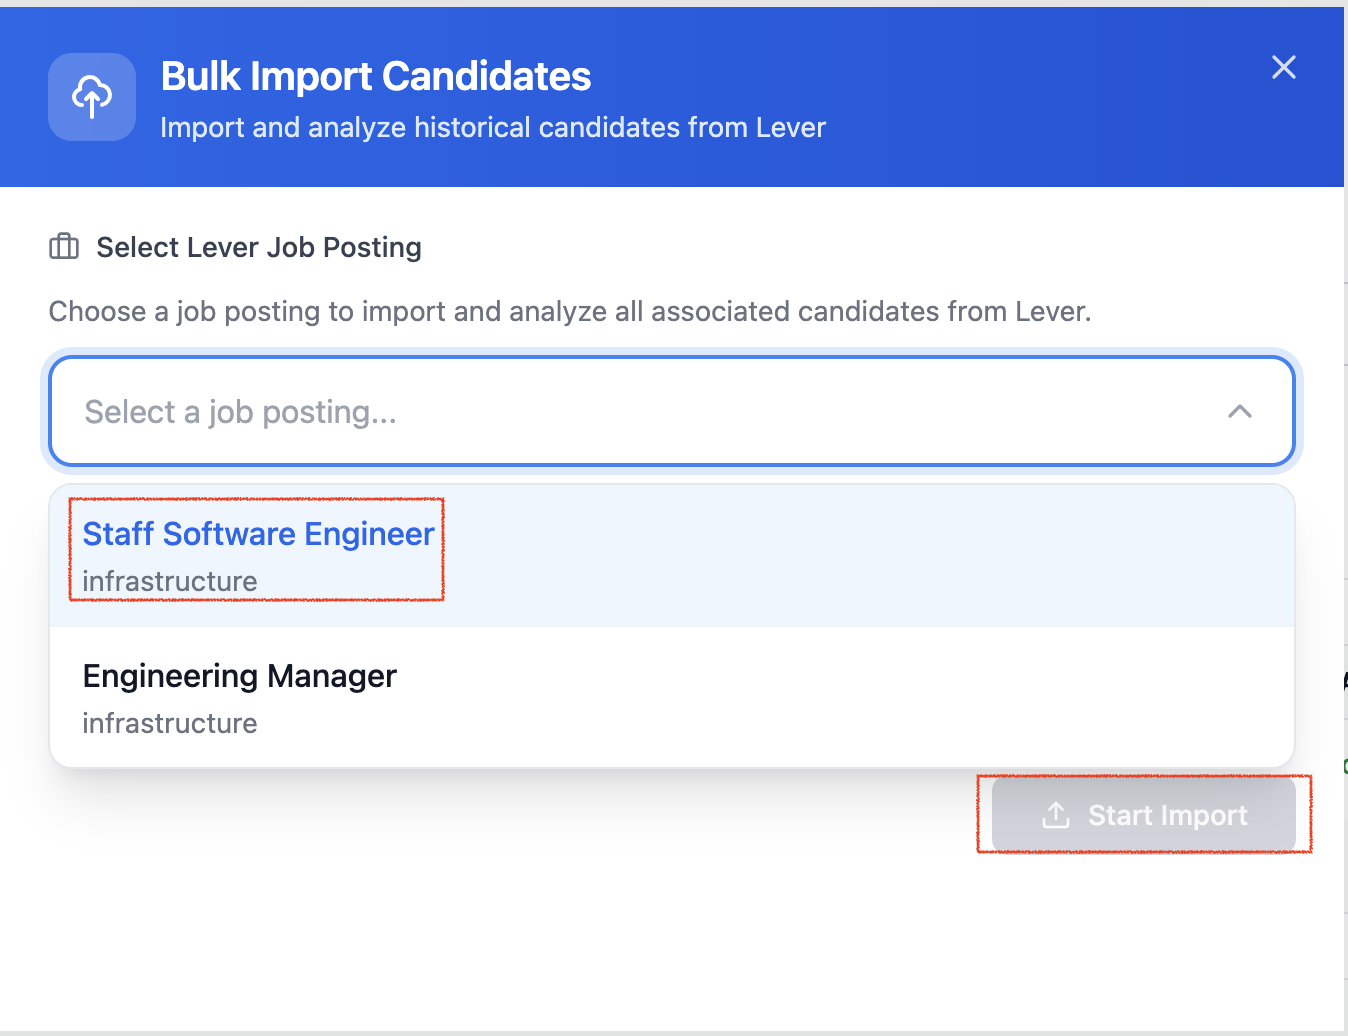
In the Bulk Import modal:
- Select a job posting from the dropdown menu
- Click "Start Import" to begin analyzing all candidates associated with that job
SwiftLynx will analyze all candidates associated with the selected job and create a consolidated report. After clicking Start Import, a progress window will open showing the analysis progress. Once the import completes, you'll see "Import Completed!" with a link to view the full report.
After the bulk import completes, each candidate will have:
- A detailed analysis note in their Lever profile (in the NOTES tab)
- A match score tag on their profile
- Their analysis included in the consolidated report (accessible via the report link in Slack or at the end of the analysis note in Lever)
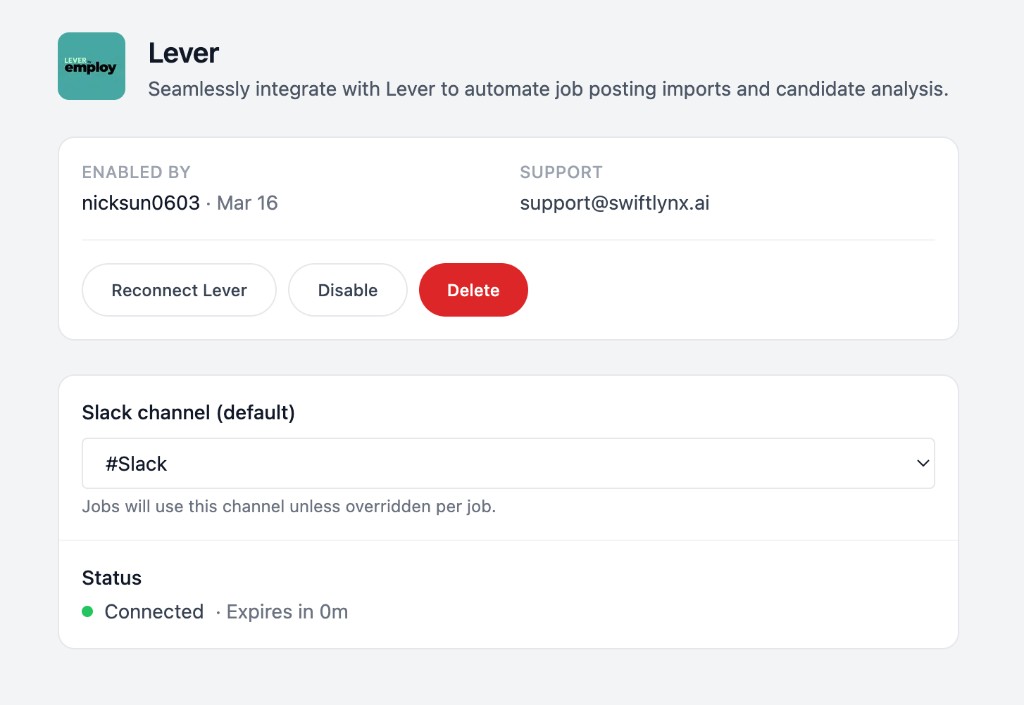
Reconnecting Your Integration
SwiftLynx automatically refreshes your OAuth access token when it expires (after one hour). However, you may need to manually reconnect in the following situations:
- Refresh token expired: If your refresh token expires (refresh tokens expire after one year or after 90 days of inactivity, according to Lever's OAuth policy), you'll need to reconnect to get a new refresh token.
- Token revoked: If you revoke access in Lever's settings, or if Lever invalidates your tokens, you'll need to reconnect.
- Refresh failed: If automatic token refresh fails for any reason, you may need to reconnect.
Important: Lever webhooks use a separate signatureToken for authentication, which is independent of the OAuth token. This means webhooks can still be received even if the OAuth token expires.
However, to actually analyze candidates and add results to Lever, SwiftLynx needs a valid OAuth token to:
- Read candidate resumes from Lever
- Read job descriptions from Lever
- Add analysis notes and tags to Lever opportunities
SwiftLynx automatically refreshes OAuth access tokens when they expire (with a 5-minute buffer before expiration).Access tokens expire after one hour (you can see the expiration time in your integrations list), and SwiftLynx will automatically refresh them using the refresh token. The refresh mechanism includes automatic retries for network errors and temporary API issues.
However, if the refresh token itself expires (refresh tokens expire after one year or after 90 days of inactivity, according to Lever's OAuth policy), or if you revoke access in Lever, webhooks will still be received, but candidate analysis will not complete until you reconnect the integration.
To reconnect your integration:
- Go to SwiftLynx → Settings → Integrations
- Find your Lever integration and click Reconnect
- You'll be redirected to Lever to re-authorize SwiftLynx
- After authorization, your integration will be updated with fresh tokens
Troubleshooting
- No Slack message? Verify the Slack webhook URL is correct/active. Check Settings → Integrations → Lever for error logs and that your account has credits.
- OAuth authorization failed? Make sure you're using a Lever account that exists in your Lever instance. If you see "access denied", try selecting a different account or contact your Lever administrator.
- Webhook not created? Check that you have the necessary permissions in Lever. The integration requires admin-level permissions to create webhooks. If the webhook creation fails, you can manually create it in Lever using the webhook URL shown in your integration settings.
- Not receiving notifications for some jobs? Check your job monitoring configuration. By default, all jobs are monitored with a default score threshold of 80 (candidates scoring 80 or above will trigger notifications). You can exclude specific jobs or set custom score thresholds for individual jobs.
- Bulk import not working? Ensure you have sufficient credits and that the job is properly configured in your monitoring settings. Bulk imports work best with jobs that have detailed descriptions.
- Token expired? Click Reconnect on your Lever integration to refresh the OAuth tokens. This will redirect you to Lever to re-authorize SwiftLynx.
Need help? Email support@swiftlynx.ai.
OAuth tokens are encrypted at rest. Webhooks are automatically managed and verified with HMAC signatures.